
How can you make green if all you have is yellow and blue? Mix them together! A color spinner is a device that lets you mix different colors together by spinning a disk of paper that you color. A disk that is part blue and part yellow will look green when spun quickly enough! Does it matter how much of the disk is yellow and how much is blue? What happens if the yellow and blue sections are strangely shaped? What happens if you use different colors? Experiment and find out!
It's also fun to put a blank disk and color it while it is spinning. See what kind of neat patterns you can make!
Minimum Materials Needed for Construction:
- Small, Direct Current (DC) motor
- 12" of insulated, copper wire
- Batteries
- Magic markers
- Paper disks
Optional Materials:
- Baseboard (wood or other material)
- Battery holder
- Soldering iron
- On/off switch (a momentary contact switch works nicely)
- Rubber erasers
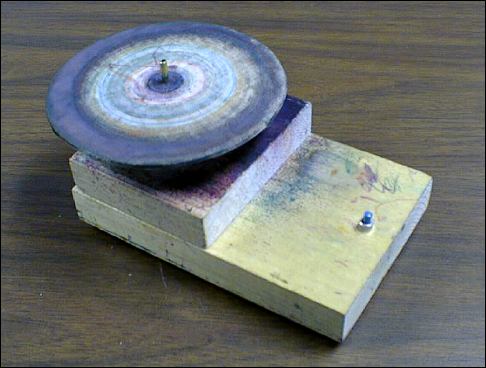
A Completed Color Spinner
Construction Directions:
1. Get a small electric motor. The motor should run on Direct Current (DC, NOT Alternating Current (AC)) and should require no more than 6 Volts to run. These motors can be salvaged from old toys or bought at a store such as Radio Shack.
2. If the motor does not already have wires attached to it, attach a four inch long wire to each of the motor's two power tabs.
3. You need to make the motor stand upright. You can take a small piece of wood and drill a hole in it that has the same diameter as the motor. The motor can then be secured in the hole with tape or glue. If you don't have a drill that can make a hole as large as the motor, try attaching three popsicle sticks to the motor as in Diagram A.
4. The motor wires now need to be attached to the batteries. This is easiest if the batteries are held in a battery holder. Connect one of the motor's wires to one of the wires on the battery holder. The motor will run when the motor's second wire is connected to the battery holder's second wire.
5. A switch can be installed between the motor and battery holder. This will allow the motor to be turned on and off without disconnecting wires or removing the batteries from the battery holder. The proper position of the switch is shown in Diagram B.
6. Color a paper disk (a disk about 2 inches across works well) with markers or crayons and attach it to the motor's axle. Turn the motor on and see what you get! If the paper doesn't stay on the motor's axle, you can try to hold it in place by fitting a pencil eraser to the axle. Tape can also work.

Diagram A
Diagram B
Citation and linking information
For questions about this page, please contact Carol McKisson.