Jefferson Lab's Workbench Projects
Assembly
- Insert the uncapped end of the 6 1/2" long dowel rod into the 1 1/8" diameter hole in one of the two base pieces. Make certain that the dowel is completely seated within the base.
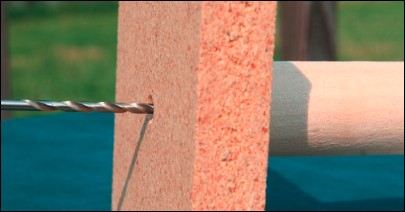
- Extend the 1/8" pilot hole into the dowel rod by using the existing pilot hole in the base as a guide.

Extend the 1/8" diameter pilot hole into the dowel rod.
- Insert the uncapped end of the 3 1/2" long dowel rod into the 1 1/8" diameter hole in the second base. Extend the pilot hole in this piece as well.
- Remove both dowel rods from both bases.
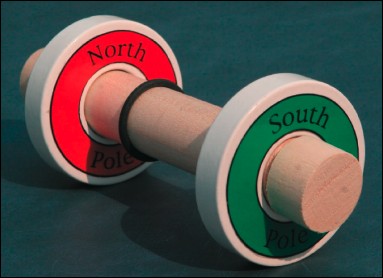
- The 6 1/2" long dowel rod will hold two permanent magnets which repel each other. Slide one magnet onto the dowel rod. This magnet's south pole should be pointing toward the 'cap' glued to the end of the dowel rod. Place an O-ring on the dowel rod, followed by a second permanent magnet. The second magnet should have its north pole pointing toward the 'cap' end.

The longer dowel rod has magnets which are arranged to repel each other.
- Reattach the base and secure it to the dowel rod with a 2" long drywall screw.
- With the device standing upright and with the bottom magnet resting on the base, move the O-ring down until it is pressing against the bottom magnet.
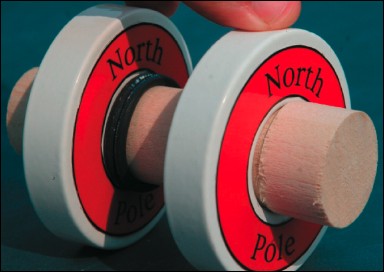
- The 3 1/2" long dowel rod will hold two permanent magnets which attract each other. Slide one magnet onto the dowel rod. This magnet's north pole should be pointing toward the 'cap' glued to the end of the dowel rod. Place two O-rings on the dowel rod, followed by a second permanent magnet. The second magnet should have its north pole pointing toward the 'cap' end.

The shorter dowel rod has magnets which are arranged to attract each other.
- Reattach the base and secure it to the dowel rod with a 2" long drywall screw.
- With the device standing upright and with the bottom magnet resting on the base, move the two O-rings down until they are both pressing against the bottom magnet. Two O-rings are used in this configuration in order to prevent the user's fingers from getting pinched between the two magnets.
- Attach four adhesive feet to the bottom of each base.
- All done!
Citation and linking information
For questions about this page, please contact Education Web Administrator.
