Jefferson Lab's Workbench Projects
Base Board Preparation
- Cut a 9 1/4 inch long section from the 1 × 6 pine board. This piece will become the base of the support frame.
- Turn the base board so that its long edge runs from right to left.
- Make two center line marks, one on the right side of the piece and one on the left side of the piece. This marks where the support arms will join with the base board.
- Draw a line parallel to the right edge of the base board that is as far away from the right edge as half the thickness of your 1 × 2 pine board. Although a reasonable person may think that a piece of 1 × 2 pine board would be one inch thick and two inches wide, it typically is not. You can expect your 1 × 2 pine board to be roughly 3/4 inches thick and 1 1/2 inches wide. Make certain that this line intersects the center line and extends about an inch above and below it.
- Mark two points on the line that is parallel to the right edge of the base board, one that is 3/8 inch above the center line and one that is 3/8 inch below the center line. Drill 9/64 inch diameter pilot holes at these two points.
- Repeat steps 4 and 5 with the left edge of the base board.
- That's it! The base board is now ready!
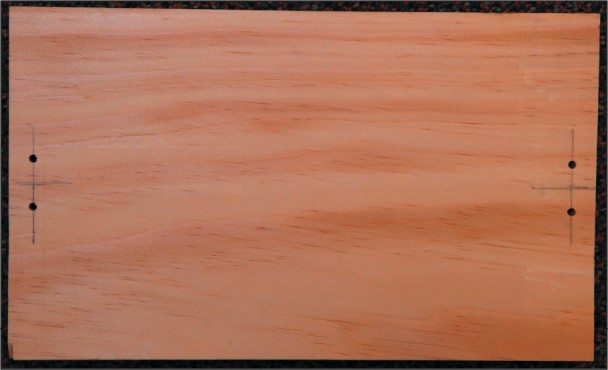
Pilot holes have beed drilled in the base board.
Citation and linking information
For questions about this page, please contact Education Web Administrator.