Jefferson Lab's Workbench Projects
Support Arm Preparation
- Cut two 13 1/2 inch long sections from the 1 × 2 pine board. These two pieces will become the left and right support arms.
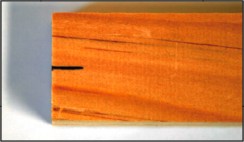
- Take one of the pieces and mark its center line along one of the ends. This end will become the bottom of the support arm. The center line mark will help align the piece with the base board as well as help locate the locations of the support dowel holes.

The center line has been marked at the end of one support arm.
- Make a second center line mark about 10 inches away from the first end.
- Use the drill pattern found in Appendix A to mark the locations of the support dowel holes. Align the bottom of the drill pattern with the bottom of the support arm. Match the center line marks on the support arm with the center line marks on the drill pattern.
- Use a 5/8" diameter drill bit to cut the four holes needed in the support arm.
- Repeat steps 2 through 5 with the second support arm.
- Cut eight 2 inch long sections from the 5/8" diameter wood dowel.
- Flip the two support arms so that the centerline marks are facing down.
- Apply a little wood glue in each of the support dowel holes and insert the dowels. You may need to use a rubber mallet to fully position the dowels. They should end up being flush with the marked side of the support arm.
- The support arms are now ready! We just need something to attach them to...
Citation and linking information
For questions about this page, please contact Education Web Administrator.
