Jefferson Lab's Workbench Projects
Coil Construction
- Take a small piece of tape or paper and attach it to the end of the roll of 22 gauge magnet wire. Write the number '1' on the piece of tape or paper. This will be used later to identify the electromagnet's leads.
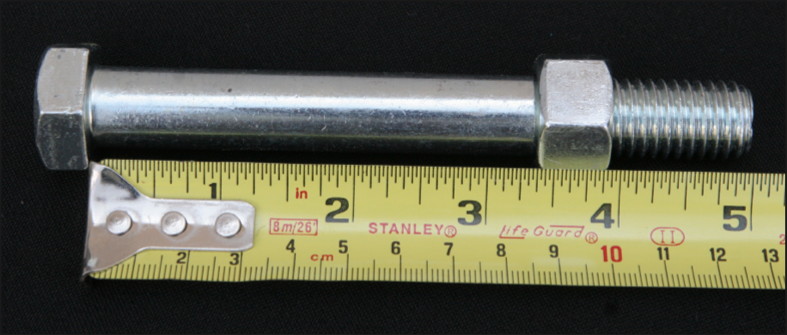
- Attach a nut to the threaded end of the 5/8" hex bolt. Tighten the nut until it jams against the unthreaded portion of the shaft. This will create an area roughly 3 and 3/8" across where you will wrap your electromagnet's coil.
Use the area between the hex cap and the hex nut to wrap your coil.
- Starting at the hex nut and working your way towards the hex cap of the bolt, begin wrapping the 22 gauge magnet wire around the shaft of the bolt. Do not start wrapping the coil from the very end of the wire. Give yourself a foot or so of 'extra' wire at the beginning of the coil. The label you created in Step 1 should be attached to this 'extra' portion of wire. The coils should be wound as neatly and as tightly as possible.
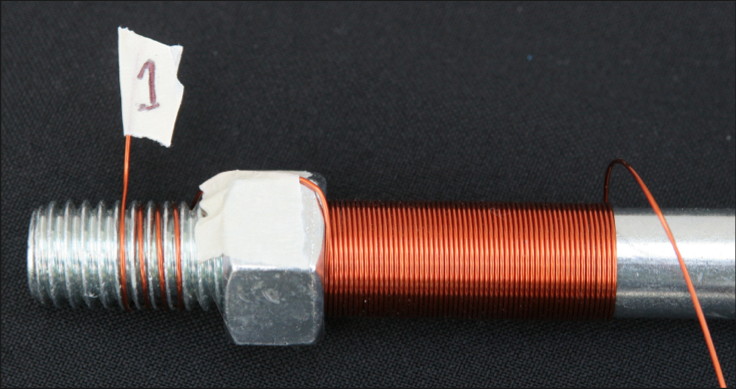
Begin wrapping the coil at the hex nut, leaving some extra wire at the beginning of the coil.
- When the windings reach the hex cap, begin a second layer atop the first layer. Work will now progress towards the hex nut but the direction of the windings will remain unchanged. For example, if the wire was being wound about the bolt in a clockwise fashion on the first layer, the clockwise motion would continue on the second layer, and all subsequent layers.
- When the windings reach the hex nut, begin wrapping the third layer, working towards the hex cap.
- When the third layer is complete, create a center tap by running the magnet wire directly up the shaft of the bolt. Extend the wire about a foot beyond the end of the bolt. Label this outgoing wire '2.'

Three layers of wire have been wrapped around the core. Before continuing with the fourth layer, the wire was brought back up the length of the bolt's shaft in order to create a center tap.
- Bend the wire back upon itself and run it directly down the shaft of the bolt to the hex cap. Label this ingoing wire '3.'
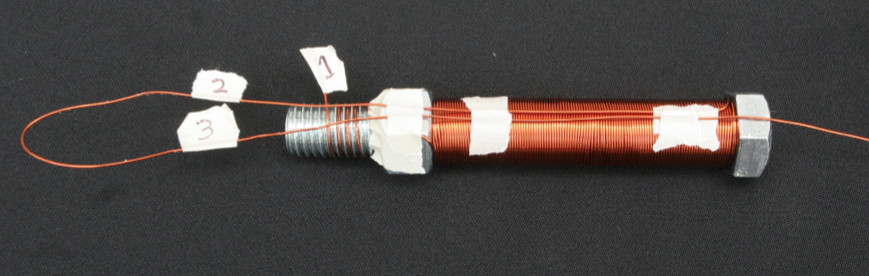
Bend the wire back upon itself in order to complete the center tap.
- Wind the fourth layer of the coil. It will start at the hex cap and work its way up the shaft. Make certain that the fourth layer is wrapped in the same direction (clockwise or counter-clockwise) as the rest of the coil.
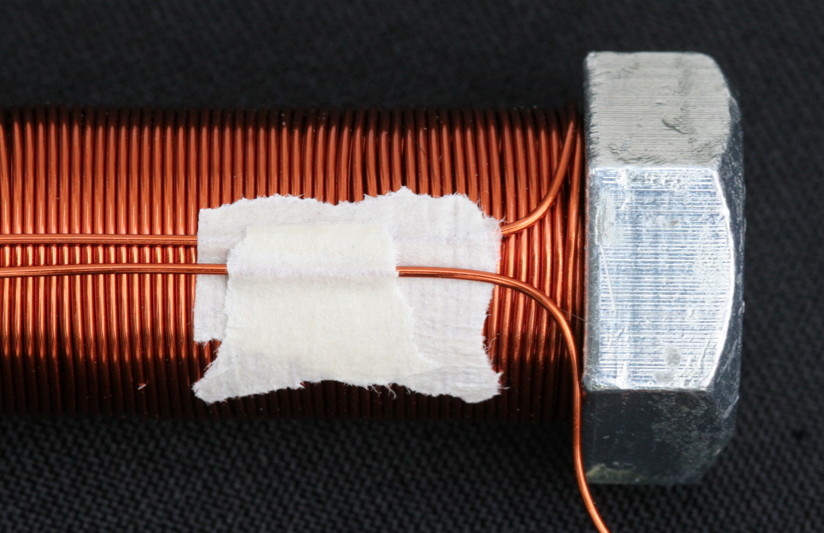
Continue wrapping the fourth layer as if the center tap never happened. Use small bits of tape to hold the center tap wires in position.
- When the fourth layer is complete, add a fifth layer.
- When the fifth layer is complete, add a sixth layer. This is the coil's final layer of wire. When the sixth layer is complete, cut the wire from the spool, giving yourself about a foot or so of 'extra' wire. Label this final lead '4.'
- Cover the coil with epoxy and let it set.
- Cut the loop of wire that was formed when you created the center tap in steps 6 and 7. Make the cut between the labels you placed on that section of wire. When complete, your coil will have four leads protruding from it, labeled 1, 2, 3 and 4. Each of these leads should be a foot or so long. Leads 1 and 2 control the inner three layers of the coil while leads 3 and 4 control the outer three layers. The full coil consists of about 780 turns of wire and has a total resistance of about 2.6 ohms.
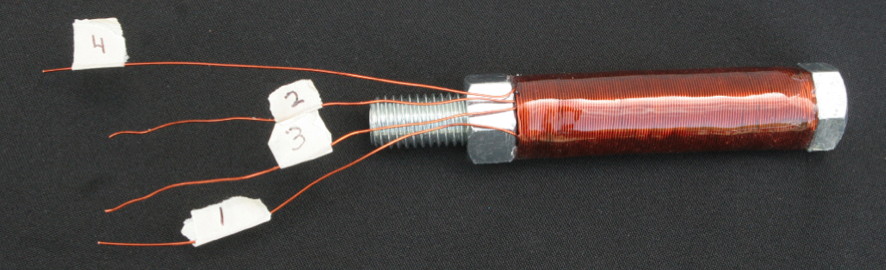
The completed coil.
- Use a medium grit sandpaper to scrape away the enamel insulation from the last inch of each of the four lead wires. If the labels are in the way, move them but keep them on their respective leads. It is in your best interest not to lose track of which lead is which!
- That's a wrap!
Citation and linking information
For questions about this page, please contact Steve Gagnon.