Jefferson Lab's Workbench Projects
Base Construction
- Cut four pieces from the 1 × 4 white pine board. Make each piece 6 3/4" long.
- Miter cut both ends of each piece to a 45° angle.
- Use a router to cut a 1/4" × 1/4" groove on the section of each piece that will eventually become the top, inside portion of the base.
- Choose one of the four pieces as the one that will become the back of the base and drill two holes in it, one to accept the power cord and one to accept the power switch. Since our power switch was not designed to be used with a material as thick as the pine board, a Forstner bit was used to remove the excess wood.
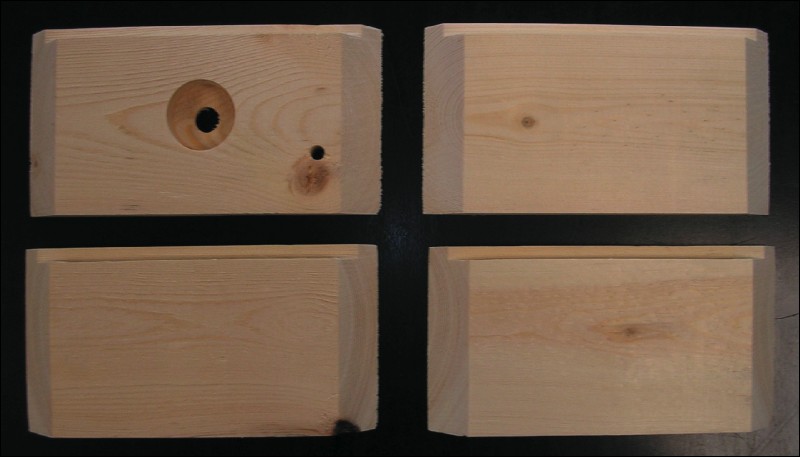
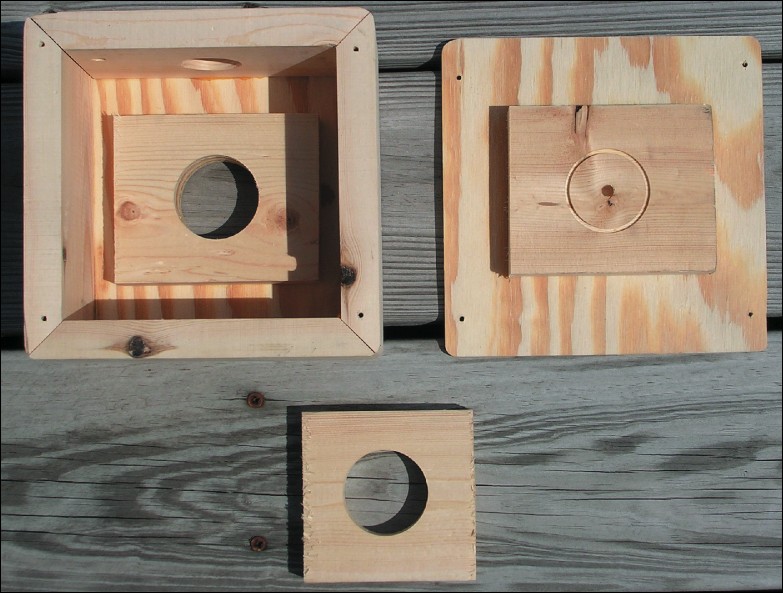
The four sections of white pine that will form the base.
- Join the four sections together to form a box. Use wood glue and finishing nails to secure the joints.
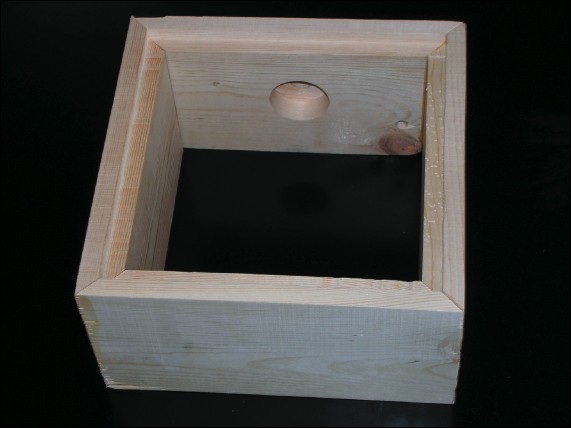
The four sections are joined together.
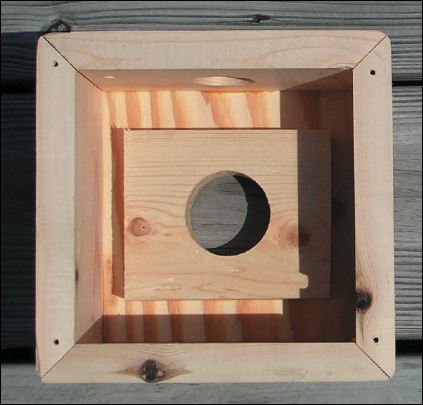
- Cut two panels from the 1/4" plywood. One of the panels will form the top plate of the base while the other will form the bottom plate of the base. The exact dimensions depend on the size of your base. You can expect the top plate to be roughly 5 3/4" × 5 3/4" and the bottom plate to be about 6 3/4" × 6 3/4".
- Use wood glue to attach the top plate to the base. Mark the center of the top base board and another point on the top base board 1 1/4" away from the center towards the back of the base.
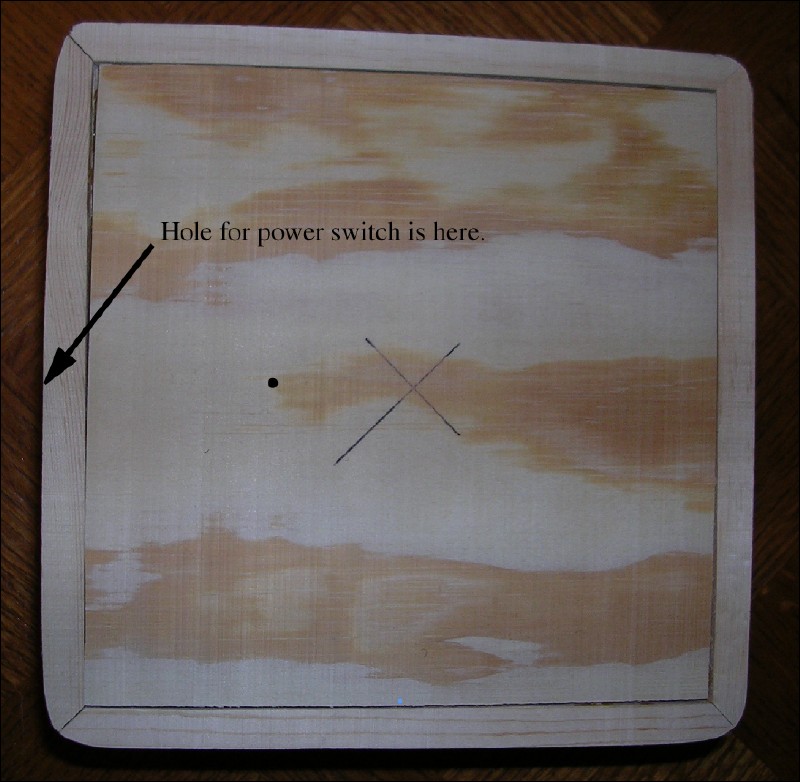
Two points are marked on the top base board.
- Cut three pieces from the 1 × 4 white pine board. Make each piece about 4" long. These pieces will be used to reinforce the top and bottom base boards as well as to secure the core to the base. Glue one of the pieces to the inside of the top base board and another to the inside of the bottom base board. Aim for the centers of both of the boards. The third piece will be used in a later step.
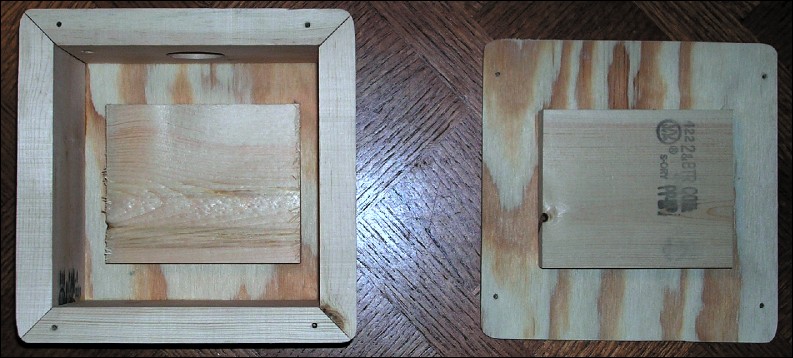
Reinforcement pieces are attached to the top and bottom base boards.
- Use a 1 3/4" diameter hole saw to cut a hole through the center of the top base board as well as the reinforcement piece that is attached to it. This hole will eventually accept the core of the device.
A hole is cut through the top base board and its reinforceing piece.
- Attach and secure the bottom base board to the base using the four 1" long, #6 wood screws.
- Use the 1 3/4" diameter hole saw to score the bottom base board's reinforcement piece by passing the hole saw through the hole in the top base board. You are not trying to drill a hole through the bottom base board or its reinforcement piece. You are just trying to mark its location for later use. A drill press makes this step much easier.
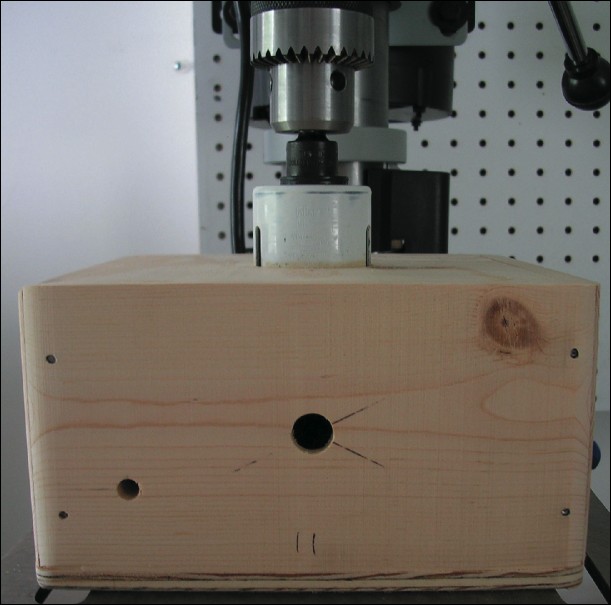
Scoring the bottom base board's reinforcement piece with a drill press by passing through the hole in the top base board.
- Use the 1 3/4" diameter hole saw to cut a hole through the center of the third piece of white pine that you made in step 8. (You didn't lose it, did you?)
- Remove the bottom base board from the base. Glue the third piece of white pine to the reinforcing piece that is already attached to the bottom base board. Use the scoring mark you made in step 11 to align the pieces.
The bottom base board's reinforcement piece has been scored and the third piece of white pine has been cut through.
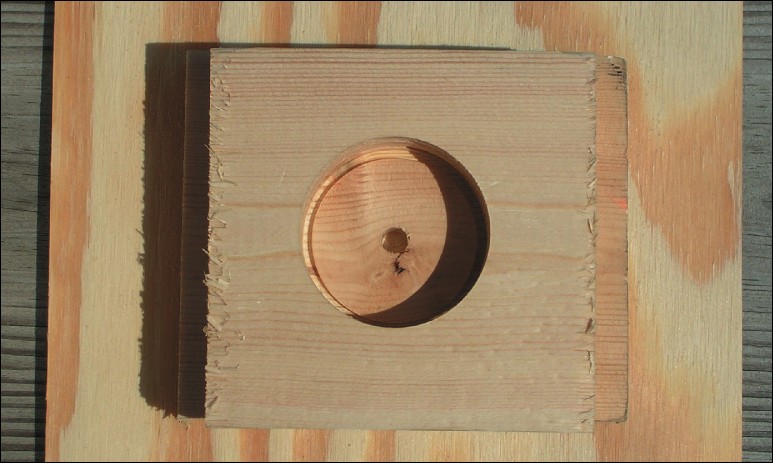
The third piece of white pine has been attached to and aligned with the bottom base board's reinforcement piece.
- Drill a 1/4" diameter hole though the top base board and its reinforcing piece at the location you marked in step 7. The leads from the coil will eventually pass through this hole.
- Sand and paint the base as desired.
- Take five. You have finished building the base.
Citation and linking information
For questions about this page, please contact Education Web Administrator.