Jefferson Lab's Workbench Projects
Coil Construction
- Use the steel wool to smooth and polish the full length of PVC pipe.
- Temporarily assemble the base and place the PVC pipe through the large hole in the top base board. Make certain the PVC pipe passes through the second alignment board and comes to rest on the bottom base board's reinforcement piece.
- Make a mark on the PVC pipe about 1/4" above the top of the base. This is where the coil will start. Some space is needed between the coil and the base in order to accommodate the wires going to and from the coil.
- Remove the PVC pipe from the base.
- Use masking tape to secure the 18 gauge wire to the PVC pipe at the position you marked in step 3. You will need about a foot of wire in order to wire the coil to the rest of the circuit, so don't forget to give yourself some extra wire at the beginning of the coil. The extra wire can be tucked into the PVC pipe in order to keep it out of the way.
- Wrap the wire around the PVC pipe for a total of 67 turns. The direction you wrap the wire is of no importance as long as you are consistent. If you start wrapping the coils in a clockwise fashion, every wrap on every layer must be done in a clockwise fashion. Alternating directions will only result in some of the wraps cancelling others. It is also important that the first layer be as neat and as tightly packed as possible. Any defects on the first layer will affect the layers above it.
- Once you complete the first layer, secure both ends with masking tape. As there is no form to support the coil, the masking tape will help prevent this layer from shifting as other layers are placed on top of it.
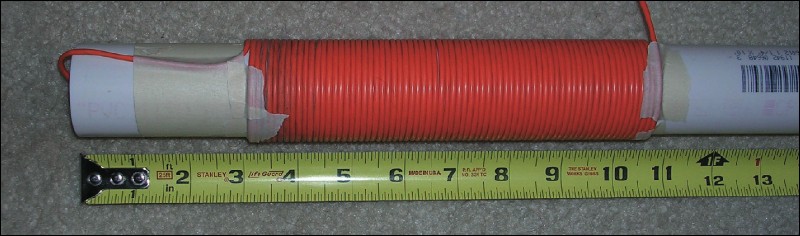
The first layer is complete and its ends are secured with masking tape. Note the extra wire that is tucked into the left end of the PVC pipe.
- Begin the second layer by wrapping the wire directly on top of the first layer. Again, it is helpful to secure the first couple of wraps with masking tape once they are in place. Try to make the face of the coil as flat as possible. While it is time consuming to achieve a flat face, it provides a much better surface for the copper and aluminum rings that will eventually be placed upon it. The ends of the coil should not have the same profile as the tip of a crayon. Although work will now progress towards the other end of the PVC pipe, the direction of the wraps (clockwise or counter-clockwise) will remain the same.
- Once the second layer is complete, secure the ends with masking tape and begin the third layer. Continue wrapping wire until you have completed 6 full layers. This should give you a coil containing about 400 wraps of wire and consuming about 230 feet of wire.
- Once all six layers have been wrapped, cut the wire from the rest of the roll, leaving about a foot of wire at the end of the coil in order to allow for electrical connections. It is helpful if the two wire leads meet naturally in the same location on the pipe.
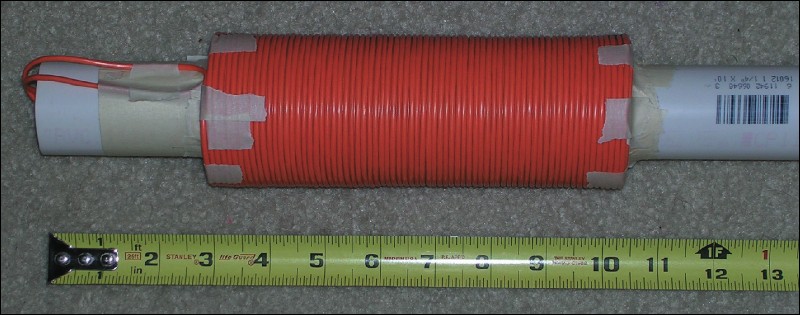
All six layers have been wrapped. Note that there are now two lenghts of extra wire that have been tucked into the PVC pipe.
- Very carefully remove the masking tape from the top face of the coil (the face without the two lead wires). A utility knife may be helpful. As this is mainly a cosmetic procedure, don't worry if you can't remove every single bit of tape, especially the pieces that are trapped between layers. Rather than completely removing the tape securing the outer layer, peel it away from the face of the coil like a banana peel. This will expose the face of the coil while still giving support to the body of the coil.
- Open and mix a packet of 5 minute epoxy. Turn the coil upright and flood the top face with epoxy. Keep the coil upright until the epoxy cures.
- Remove the masking tape from the bottom face of the coil just as you removed it from the top face. Do not remove the tape from the two lead wires. Keep them secured to the PVC pipe.
- Open and mix a packed of 5 minute epoxy. Invert the coil and flood the bottom face with epoxy. Keep the coil inverted until the epoxy cures.
- When you are certain that the coil is secure and won't self-destruct, remove any remaining masking tape and free the two lead wires. Make a single cord out of the two lead wires by braiding them together.
- Relax. Go get some milk and cookies. That feeling of satisfaction you have means that you are done building the coil.
Citation and linking information
For questions about this page, please contact Education Web Administrator.